Teilen Sie Ihre Erfahrunge und Wünsche mit uns und anderen Usern!

 Writing to PLC inputs
Hi,
If i have PLC connected and imported signals...how would i approach writing for example a velocity of a rigid body into the value of a PLC signal under TwinCATInterface?

Hi Leve,
I assume that you are having PLCInputs and PLCOutputs in your project after importing from TwinCAT:
Now you can write to the PLCInput with
PLCInput.Value = YourValue;
You should write your own behavior scripts and attach this to the Gameobject with the rigid-body where you want to measure the velocity.
Here is a simple example of a behavior script (it is the Sensor_standard script from the Game4Auomation Framework).
This script is sending a "High" to the PLC when the sensor is occupied.
namespace game4automation
{
    [RequireComponent(typeof(Sensor))]
    //! The Sensor_Standard component is providing the Sensor behavior and connection to the PLC inputs and outputs.
    public class Sensor_Standard : BehaviorInterface
    {

        [Header("Settings")] public bool NormallyClosed = false;  //!< Defines if sensor signal is *true* if occupied (*NormallyClosed=false*) of if signal is *false* if occupied (*NormallyClosed=true*)
        [Header("Interface Connection")] public PLCInputBool Occupied; //! Boolean PLC input for the Sensor signal.

        private Sensor Sensor;
        private bool _isOccupiedNotNull;

        // Use this for initialization
        void Start()
        {
            _isOccupiedNotNull = Occupied != null;
            Sensor = GetComponent<Sensor>();
        }

        // Update is called once per frame
        void Update()
        {
            bool occupied = false;

            // Set Behavior Outputs
            if (NormallyClosed)
            {
                occupied = !Sensor.Occupied;
            }
            else
            {
                occupied = Sensor.Occupied;
            }

            // Set external PLC Outputs
            if (_isOccupiedNotNull)
                Occupied.Value = occupied;

        }
    }
}
Problems importing into a project
Hi!
So my problem is that when i try to import the asset package into my existing project, it will import it but the Game4Automation tab will only have the Part4Cad in it. Also tried to make a new project by adding the asset first and then exporting and importing my old project, but this had the problem that colliders won't work anymore.
And one more question! (sorry I'm new to unity)
I can get the signals from my TwinCat via ADS, but how do you link the imported signals for example to a game objects Y-axis value?
Hopefully you could help me!
For anyone experiencing similar issues.
Problem was that the compile settings were not set correctly:
https://game4automation.com/documentation/current/compilerdefines.html
, that collision layers were not set correctly:
https://game4automation.com/documentation/current/physics.html
and that Prostprocessing was not included in the Assembly Definitions:
https://game4automation.com/documentation/current/game4automation.html
https://game4automation.com/documentation/current/assemblydefinitions.html

 Whats error : null texture passed to gui.drawtexture. It happens in game4automation.QuickToogle
How fix this:
null texture passed to GUI.DrawTexture
UnityEngine.GUI:DrawTexture(Rect, Texture, ScaleMode)
game4automation.QuickToggle.Editor.QuickToggle:DrawHierarchyItem(Int32, Rect) (at Assets/game4automation/private/Editor/QuickToggle/Editor/QuickToggle.cs:390)
UnityEngine.GUIUtility:ProcessEvent(Int32, IntPtr)
Hi,
we don't know this error. Could you upload your project? I will send you via email a link for uploading.
Unity project version compability issue
Hi! I have an issue with my project working with game4automation professional that we just purchased. So we have a Game/project working on unitys 2019 version and i tried to import the g4a asset in it ,but the toolbar only has the Parts4Cad option. on 2018 empty project it works perfectly, but i am not so experienced with unity and was wondering if the asset works at all with 2019 versions (most important ones TwinCat ADS or the OPCUA) OR if there is a way to downgrade projects unity version
Hi,
usually it should also work with 2019. But we recommend to use LTS (Long Term Stable) releases because Unity is sometimes changing to fast for industrial use cases. We develop and test in 2018.4. On our build server we also try to compile and build with 2019, but it is more risky that we miss something in 2019. So I would recommend to only use 2019 if you really need it.
I just checked latest release and 2019 and it works on my computer without problems. The main menu is available and the demo model is working as expected.
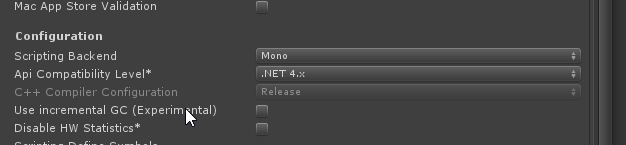
You should also check that you are using .Net4. compatibility level - even if this should be not an issue with the main menu. But some interfaces might not compile without .Net40
There seems to be an issue / collision with anything what is already in your 2019 project. I don't know what. Could you please check the Console log for some more information.

Licence question
If i would buy the Professional version for schools account, would it be tied to that account and could be used on other projects after i'm done with mine?
Hi,
the license is tied to the organization who purchased the Asset. There seems to be no official way to transfer a license to another organization (e.g. from school to you personal) if you purchased on the Unity Asset Store.
You could purchase the license directly from us. For doing so please just fill out this form (Button "Request a quote" and you will get an offer: https://game4automation.com/en/buy
We could allow you the transfer if needed later on based on a simple mail you are sending to us.
Best regards
Thomas

 Problem with rotational drive in combination with prismatic drive
Hello,
I noticed a problem with the motion axis feature in G4A. I created some sort of articulated arm which rotates around the vertical y-axis using a Drive script and a Drive_FollowPosition script. This works fine, however problems occur when I add a linear (prismatic) drive in a child object of it. I added a video to make it more clear: As you can see there is Link1 which rotates and Link2 (green) which contains a drive script with the direction "Linear Z". Since Link2 doesn't have any Drive Behaviour script yet, it shouldn't move at all, but as you can see, it starts drifting away. This problem doesn't occur when only rotational joints are used in the kinematic chain. Is it possible to fix somehow?
Hi,
you need to change this line (left = old, right = new) in the Drive script:

It will be changed in Release 1.024 (Build 246 and upwards).
For customers who wish a Beta download - please send us your Invoice Number and we can send you a download link!

Difficulty to place a can on a small conveyor
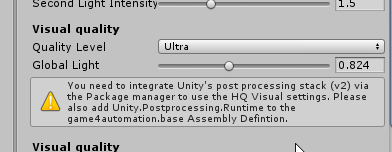
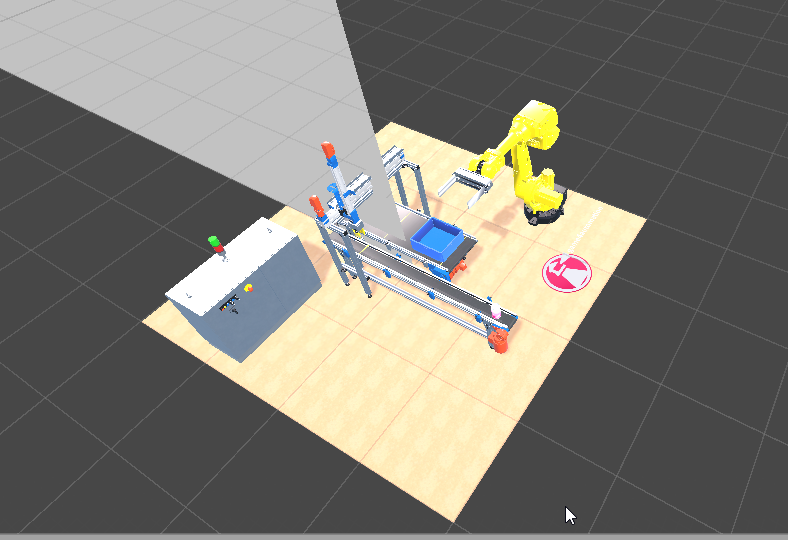
I'm trying to follow the tutorial with the small conveyor. I've inserted the conveyor and instead of deleting components I directly jumped to "Insert Source". However I can not place a can onto the conveyor. Please see pictures. Is this linked to the error/info message I see when I click on "game4automation". BTW: I can't find this post processing stack at the unity store.
Thanks!

When inserting the demo model scene or even a new game4automation there is some sort of UI screen visable. It can by hidden but it shows also a button which can not be clicked. Very strange. I have pictures if this helps
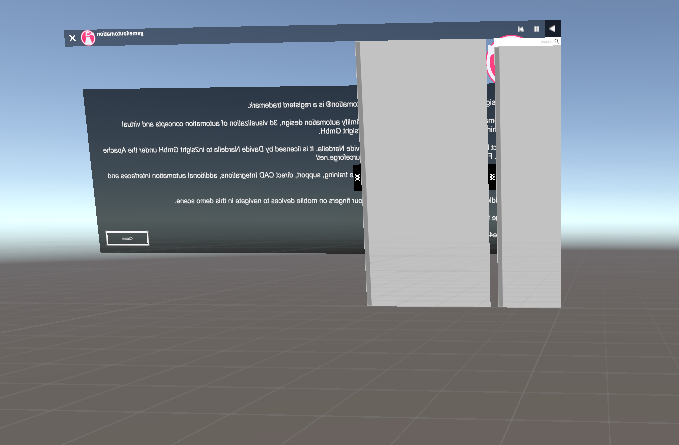
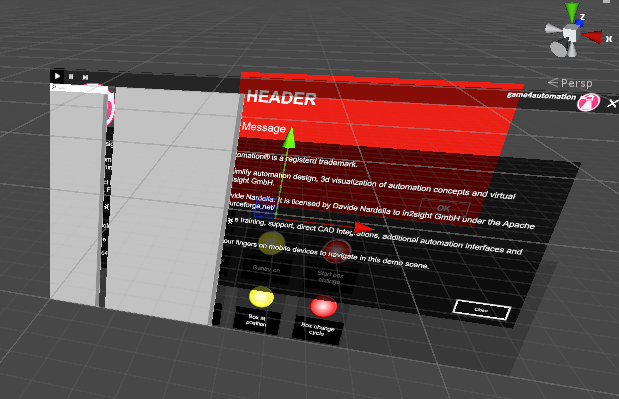
You seem to be in editor view. The UI can be disabled by
- deleting everything under game4automation (what will delete totally the UI out of the project)
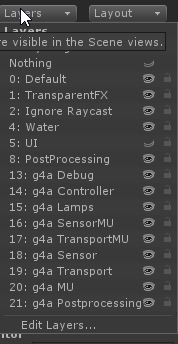
- or by deselecting the Layer
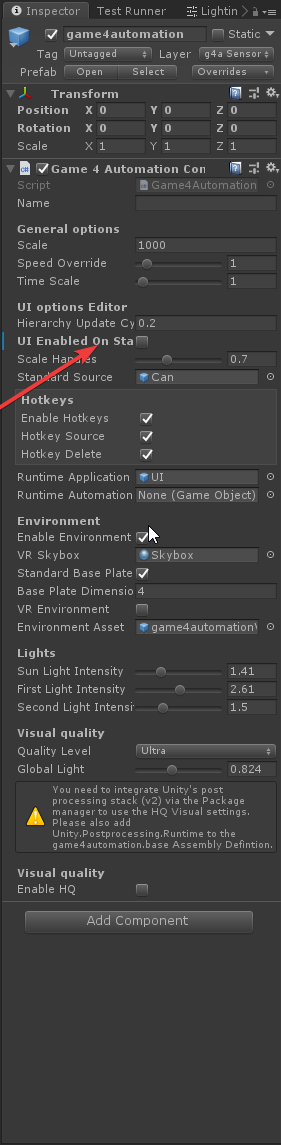
In Game mode you can deactivate the full UI deselecting this option:
OPCUA values not in PLC Output
Hello,
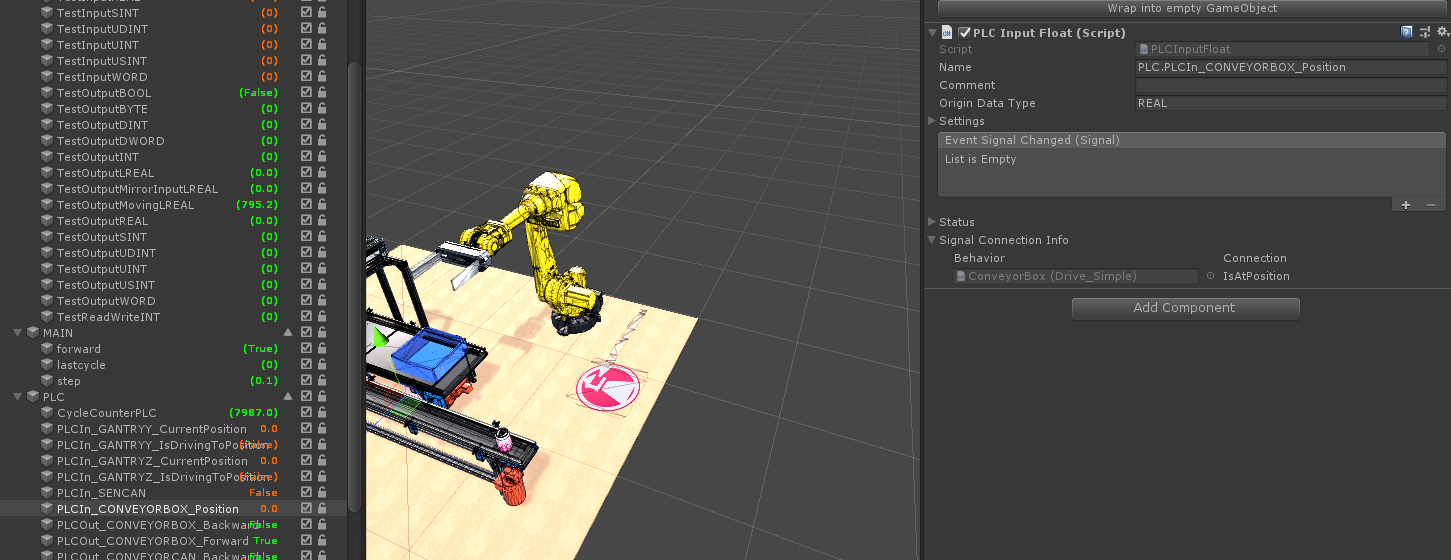
I am running the OPCUA demo with the UaCPPServer and it works fine, except that the values are not shown next to the GameObjects in Unity. I can see the current values from the server on each OPCUA_Node component, however it seems that the corresponding PLCSignals were not created like they should (from the OPCUA documentation page: "If the Game4Automation framework is installed, additionally all
corresponding PLCSignals are created. These signals can be dragged and
dropped with sensors or drives of the Game4Automation framework.")
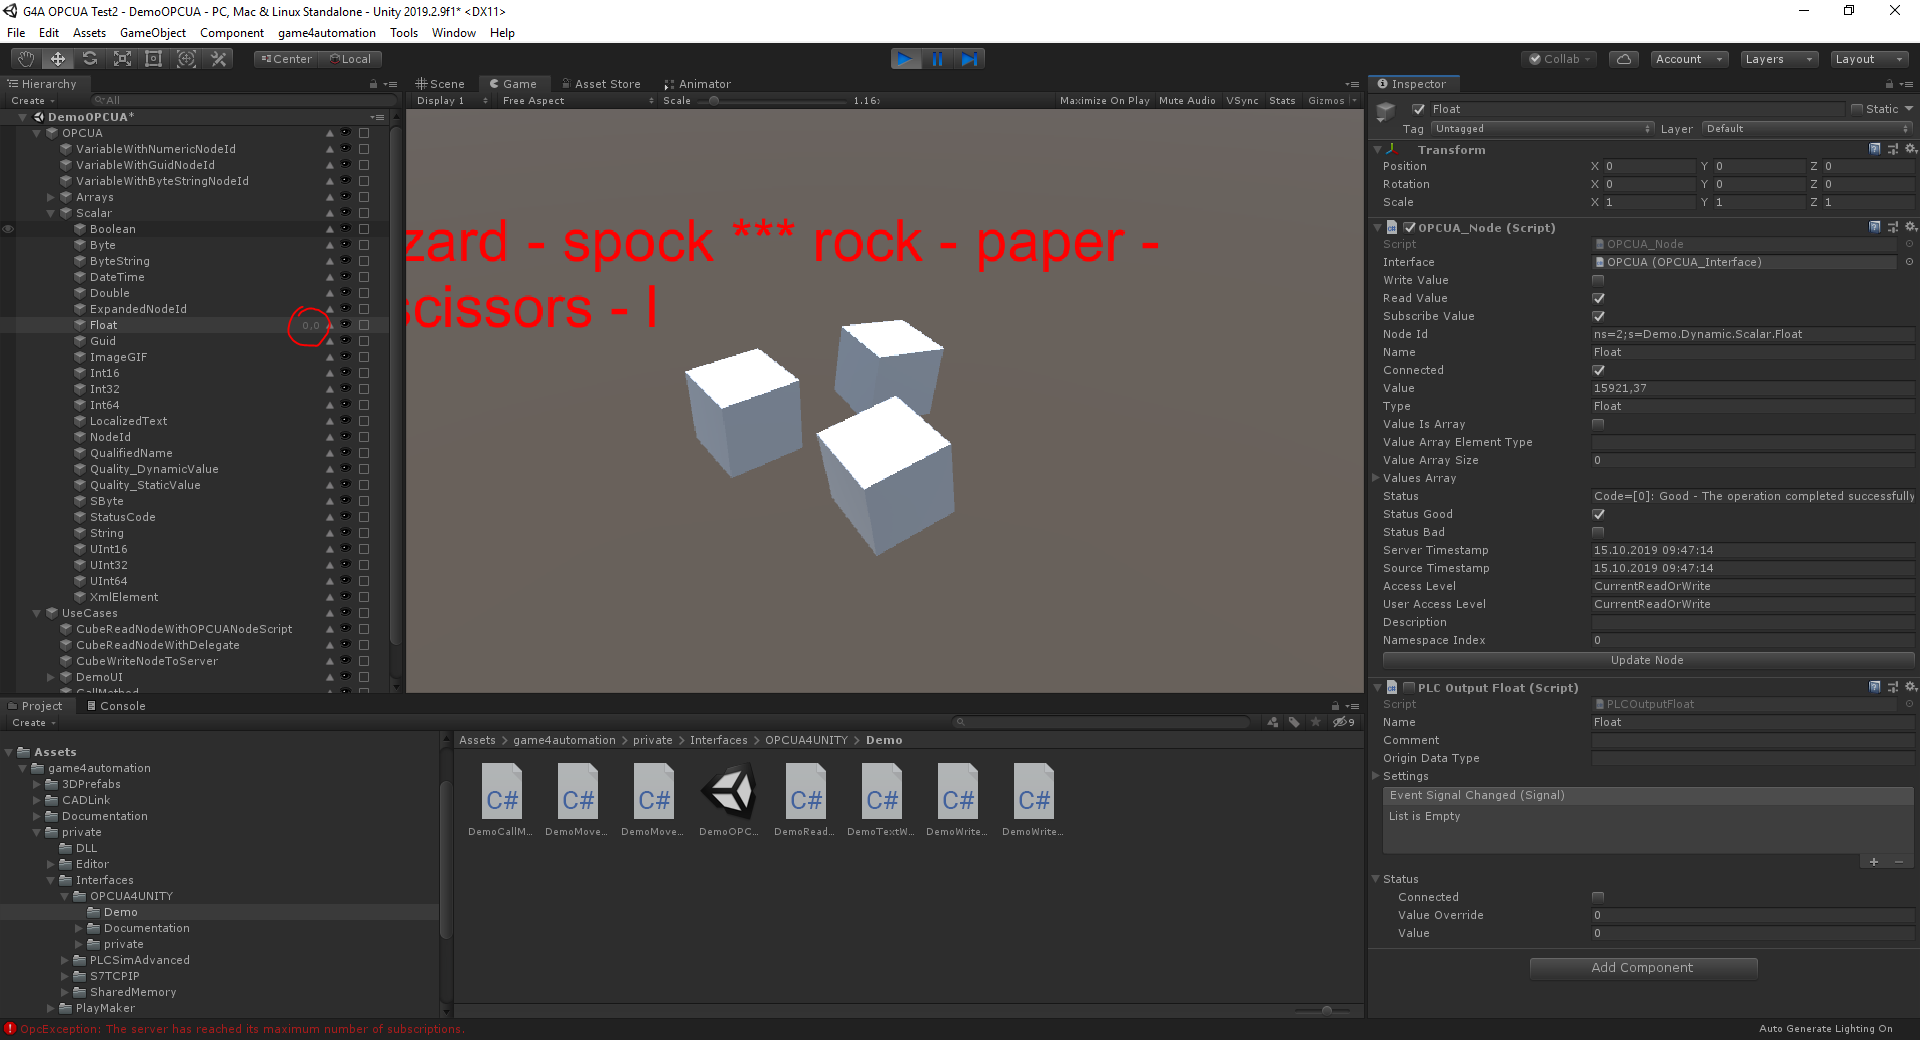
I then added a PLC Output Float script manually to the respective node (see picture). Now the current value is shown next to the GameObject, but it doesn't update.
I also tested this with the test scene (OPCUADriveReadingWriting.unity) provided here: https://forum.game4automation.com/communities/1/topics/101-write-to-opc-ua-varible-using-the-plcinputfloat-datatype
But the PLC Output value is also not updated there.
Hi,
first of all I strongly recommend to use Unity 2018.4 instead of 2019. Specially when compiling to the Build with an IL2CPP compiler there might be issues with Unity 2019.
There is something interfering with the demo use cases (need still to check what exactly).
Please follow these steps:
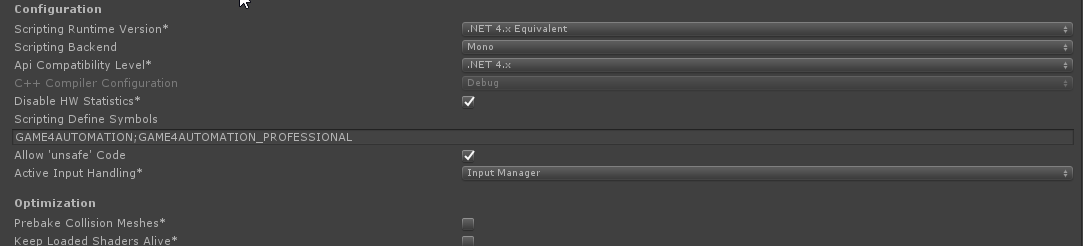
- Make sure that the compiler defines are set to GAME4AUTOMATION; GAME4AUTOMATION_PROFESSIONAL
Import while running the OPCUA server the nodes again. If you have enabled with the Compiler defines the full framework it will also create all PLCInputs and Outputs:
If you try now to run it you will get errors:

These errors are because the demo server is limited in subscriptions.
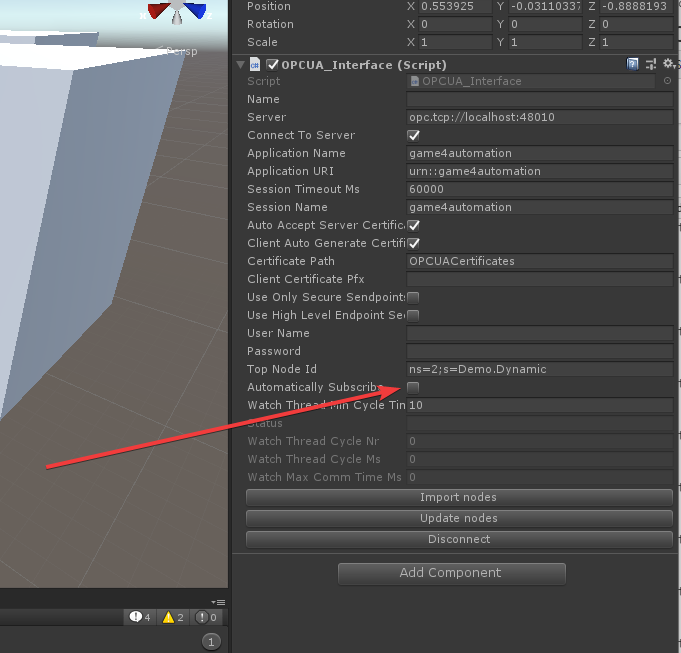
You need to turn off all subscriptions in the OPCUA nodes or you turn it off in the OPCUA interface and import again:
Please also delete the Use Cases completely (we will get rid of the problem with the use cases in the next release).
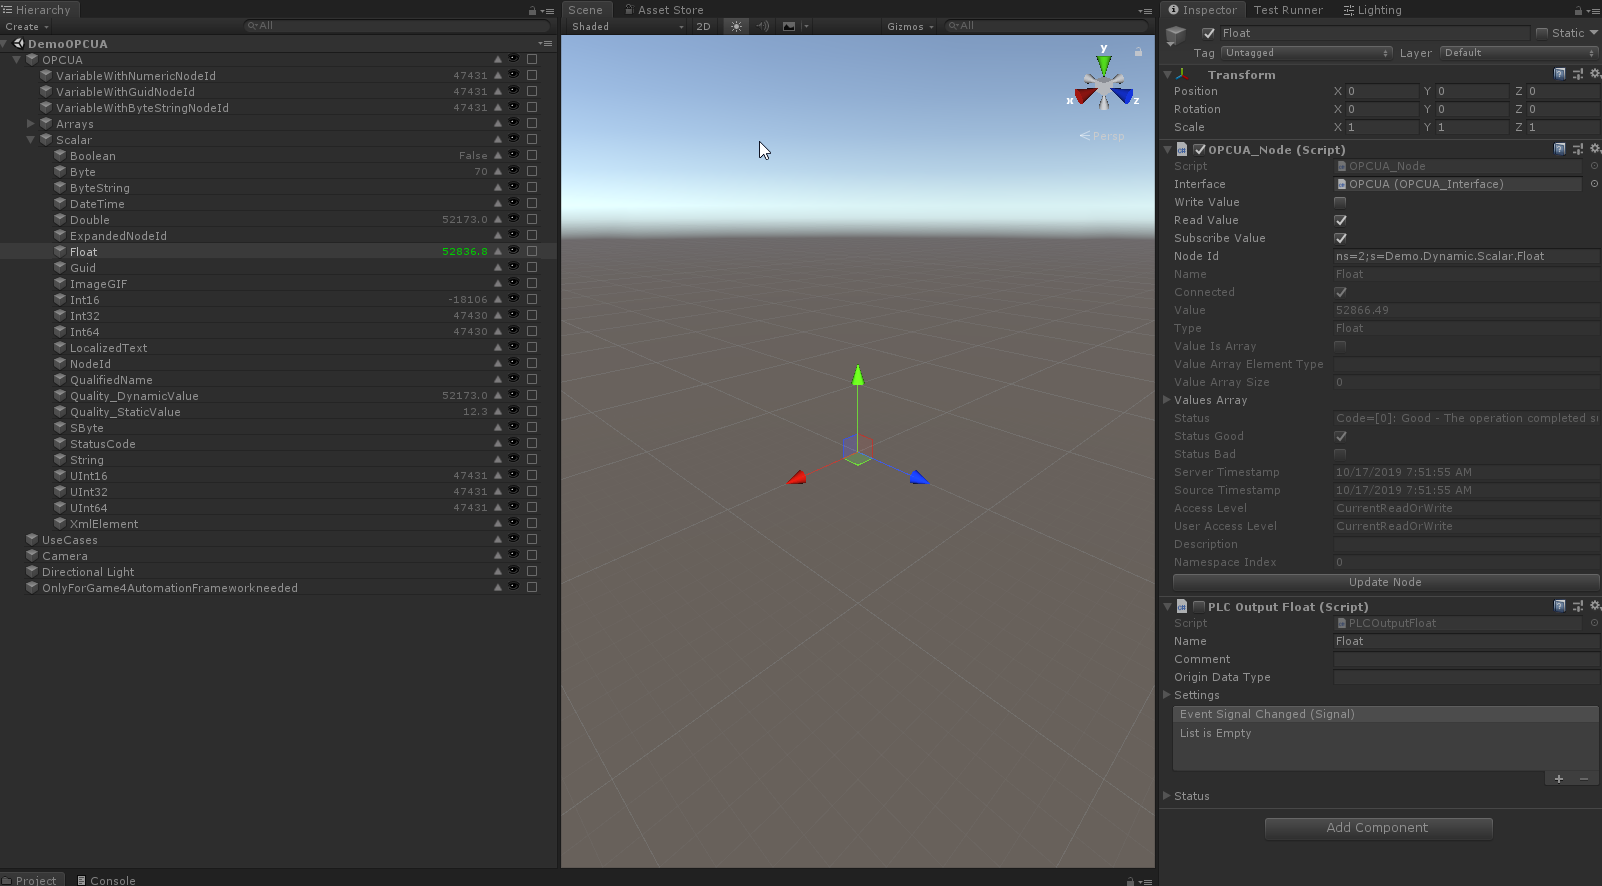
Now it should work as expected:
You find also the full working model (based on Unity2018.4) in the Uploadfoalder I have send you via mail.

Interface to SIMIT via SHM not working in build
I have recently bought the game4automation Pro, as I need simit and unity to communicate with eachother.
I have no issues getting SIMIT and unity to communicate via the SHM interface when using the "play" button from the editor, but when I run a compiled application Unity and SIMIT do not communicate.
I have tried to use both "2019.1.14f1" and "2018.4.9f1 LTS" versions of unity. As the function "Apply Standard Settings" fail in my "2019.1.14f1" project but switching to "2018.4.9f1 LTS" where the function runs without error did not help.
"GAME4AUTOMATION_PROFESSIONAL;GAME4AUTOMATION" is present in the "Scripting Define Symbols" field.
what am I missing?
Hi Dat,
I uploaded Version 1.020 to Unity's Asset Store. This should fix the problems. You can now use pure .Net4.0 projects. Also CADLink is now able to compile wit .Net4.0 settings.
It will be availabe latest on Monday on the store.
Thomas
Customer support service by UserEcho